
Simple 4-Ingredient Holiday Tree Cupcakes
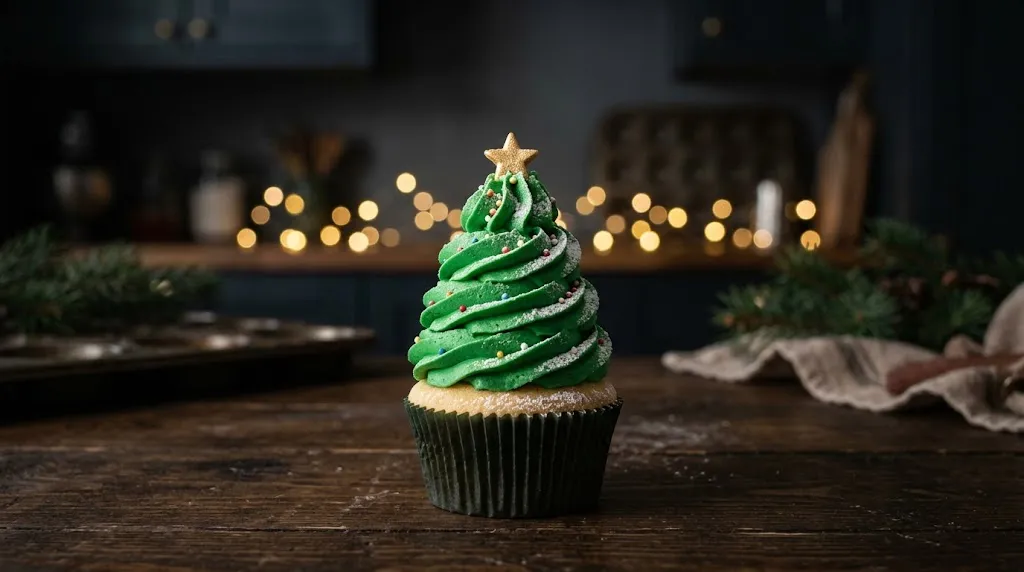
These effortless Holiday Tree Cupcakes are guaranteed to bring joy to your dessert table, delighting both kids and adults alike. They feature a fluffy, sweet vanilla base crowned with towering swirls of green frosting, styled to resemble miniature Christmas trees adorned with tiny ornaments and a brilliant gold star.

You only require four simple components to create these, and absolutely no advanced baking expertise is needed! They come together in no time, looking incredibly charming, making them an ideal choice for festive gatherings, school events, or your Christmas Eve sweet spread. Assembling them is a wonderful activity to share with children—the decorating process is truly the best part!
Consider this one of the most hassle-free holiday treats you can whip up. Once you give them a try, they might just turn into an annual December tradition for your family, just as they have for mine.

Reasons to Adore This Festive Treat
Here is why these themed cupcakes are an absolute must-try during the winter holidays:
- Just 4 Components: That’s right! No complex equipment, heavy mixers, or lengthy grocery runs necessary.
- Visually Stunning & Cheerful: Thanks to the vibrant green icing and the golden star, these look like a labor of love, even though they are incredibly straightforward.
- Crowd-Pleasers: Excellent for holiday bashes or classroom snacks. Everyone adores having their very own miniature edible tree.
- Prep-Ahead Friendly: You can easily bake the vanilla bases a day in advance, saving the frosting and decorating for right before you serve them.
What You Will Need
This recipe yields approximately 12 cupcakes—sometimes 13 if the liners aren’t overfilled. It’s a fantastic yield for sharing at winter events or enjoying a creative afternoon with the little ones.
- Vanilla Cake Mix: Sticking to a standard boxed mix keeps the process effortless, yielding a tender, golden crumb. Simply prepare it as directed on the packaging (typically requiring water, oil, and eggs).
- Vanilla Frosting: Pre-made canned frosting is highly effective here and maintains its structure beautifully. If you prefer whipping up a homemade buttercream, feel free, but the store-bought version works wonderfully!
- Green Gel Food Coloring: Gel color is essential. It delivers a rich, vibrant green hue without altering the consistency of your icing.
- Festive Sprinkles & Gold Star Toppers: These elements bring the magic! Round sprinkles or sugar pearls mimic baubles perfectly, while the tiny edible gold stars for the peak are an absolute must.
Step-by-Step Instructions
Prepare the Cupcake Base
Start by preheating your oven to 350°F (175°C) and arranging your cupcake liners in a muffin tin. Dark brown liners are a great choice as they mimic the look of a tree trunk once decorated!
Blend your vanilla cake batter based on the box guidelines. Fill each liner roughly three-quarters full to achieve a beautiful, rounded dome without spilling over the edges.
Bake for about 18 to 22 minutes, or until a toothpick inserted into the center comes out clean. Allow them to rest in the tin briefly before transferring to a wire cooling rack.
Crucial tip: Do not attempt to frost them while they are still warm, or your “trees” will melt and slide right off!
Mix the Green Icing
Transfer your vanilla frosting into a medium bowl and mix in a small amount of green gel food coloring. Start with a tiny drop and gradually add more until you reach a striking, evergreen shade. Stir thoroughly to eliminate any color streaks.
If the frosting appears too soft or your kitchen is particularly warm, place it in the refrigerator for 10 to 15 minutes. Slightly chilled frosting is much easier to pipe and holds its shape better.
Create the Tree Shape
Once the cupcakes are entirely cool and your frosting is prepped, transfer the green icing into a piping bag equipped with a large star tip (like a Wilton 1M or 2D) for that classic textured swirl.
Begin piping at the center of the cupcake, moving in an upward spiral to build the tree’s height. Perfection isn’t necessary here; once the decorations are applied, they will look fantastic regardless!
Add the Holiday Magic
While the frosting remains slightly tacky, gently press your festive sprinkles into the sides. Red, white, and gold sugar pearls work beautifully as ornaments.
Finally, place a single gold star topper at the highest point of each swirl. This finishing touch is truly what transforms them into magical miniature trees!
Common Pitfalls and Pro Tips
A minimal ingredient list doesn’t guarantee a foolproof process. Here are a few common hurdles to avoid:
- Using Frosting That Is Too Warm: Failing to chill the frosting can result in a messy, drooping structure that looks less like a tree and more like a puddle. Always give your icing a quick 10–15 minute stint in the fridge before you start piping to ensure it stands tall.
Frequently Asked Questions (FAQs)
Can I use a homemade cake recipe instead of a box mix?
Absolutely! While the box mix keeps this recipe to just 4 simple ingredients for ultimate convenience, you can easily swap it out for your favorite from-scratch vanilla cupcake recipe. The baking time might vary slightly, so keep an eye on them!
How far in advance can I prepare these Christmas tree cupcakes?
You can bake the plain vanilla cupcake bases 1 to 2 days in advance. Just store them in an airtight container at room temperature. For the best structural results, it is highly recommended to mix, chill, and pipe the green frosting on the actual day you plan to serve them.
Will liquid food coloring work instead of gel?
It is strongly advised to stick with gel food coloring. Liquid coloring adds excess moisture to the icing, which can thin it out and cause your beautifully piped trees to droop, sag, or lose their sharp texture.
Final Thoughts
These Simple 4-Ingredient Holiday Tree Cupcakes offer the perfect blend of festive charm and effortless baking. Whether you are rushing to put together a treat for a school party, or simply looking for a fun, creative kitchen activity to enjoy with the family, these little desserts are guaranteed to be a massive hit.
Remember the golden rule: chill your frosting slightly for the best piping results, and don’t stress over achieving absolute perfection. Once the colorful sprinkles and the shiny gold star toppers are in place, the magical winter aesthetic comes together beautifully. Happy baking, and enjoy creating your very own sweet, edible winter wonderland!